


Chifeng Cake

Since I learned this chiffon cake on the Internet and improved it a little, not only my family, but my friends around me like it very much. And it's simple materials are also very common If you like to bake It goes without saying Materials must be available at home
Then now I will teach you how to make this chiffon cake
[The following ingredients are suitable for six small cakes, if you want to make twelve, directlydoubleJust do it]
Corn Oil:18g
Low-gluten flour:32g
Milk:18g
Egg whites:2
yolk:2
White sugar:24g(protein) 10g(yolk)
1⃣️ The first step is to separate the eggs
Divide the egg whites into a clean, water-free and oil-free bowl, then start whisking the egg whites
[Recommended Low-Medium-High-low to beat the egg whites, this will reduce the Excessive bubbles]
If you only make six small cakes You can use a hand-held egg beater, It will be more convenient But if you do dozens of them at a time like me, if you have the conditions It is recommended to use a kitchen machine, otherwise the hands will be very tired.
2⃣️ While the egg whites are whisked on low speed to large bubbles, add span>1/3 caster sugar Switch to medium speed

When the egg whites are whisked to small bubbles, add the rest1/2 White sugar , switch to high speed

When the egg whites are whipped until patterns appear, add all the remaining white sugar, and change to low speed

Whip until the egg whites are moist and foamy When I lift it, 1cmSmall hooks on the left and right Just fine
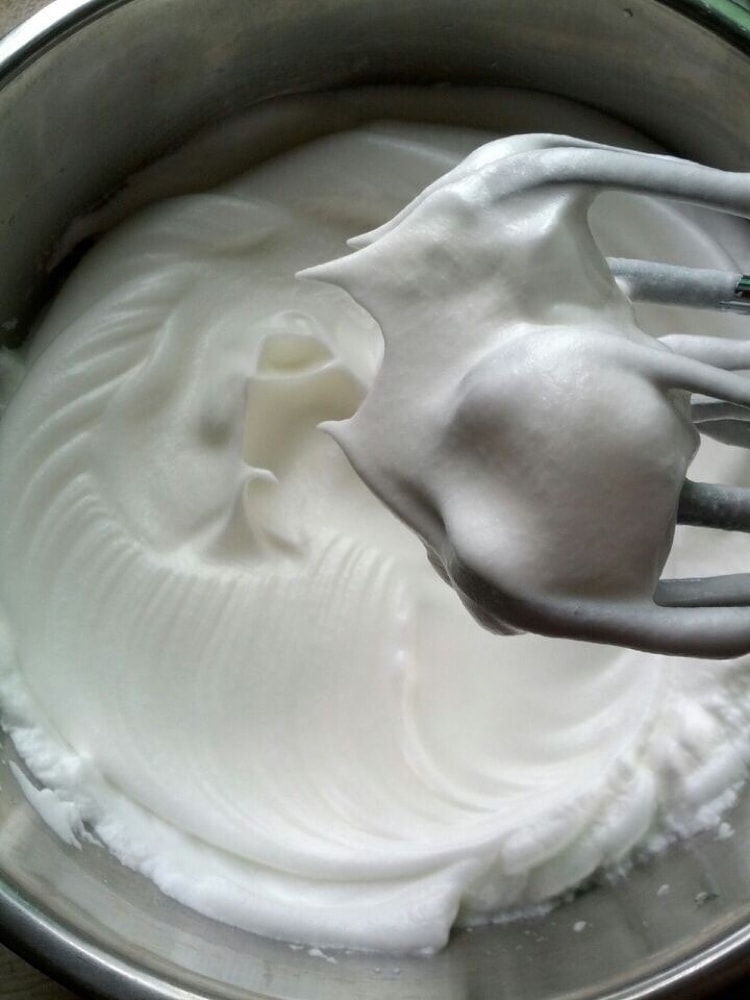
Whipping the egg whites is very important because it determines the texture of your cake So be sure to beat the protein with patience
[The cake I just made a few days ago, I didn't take a picture of the process Now All processes are network diagrams just to give you a concept, next time I do it myself, I will take pictures and replace the network Figure]
Let's deal with the egg yolks
1⃣️Add the sugar to the egg yolks at one time and mix well with a mixer
2⃣️Add corn oil and milk Stir well with a mixer
3⃣️Three times Sift the low-gluten flour into the egg yolk paste, stirring well after each sieve
[Sifting is for better taste So this step is very important]
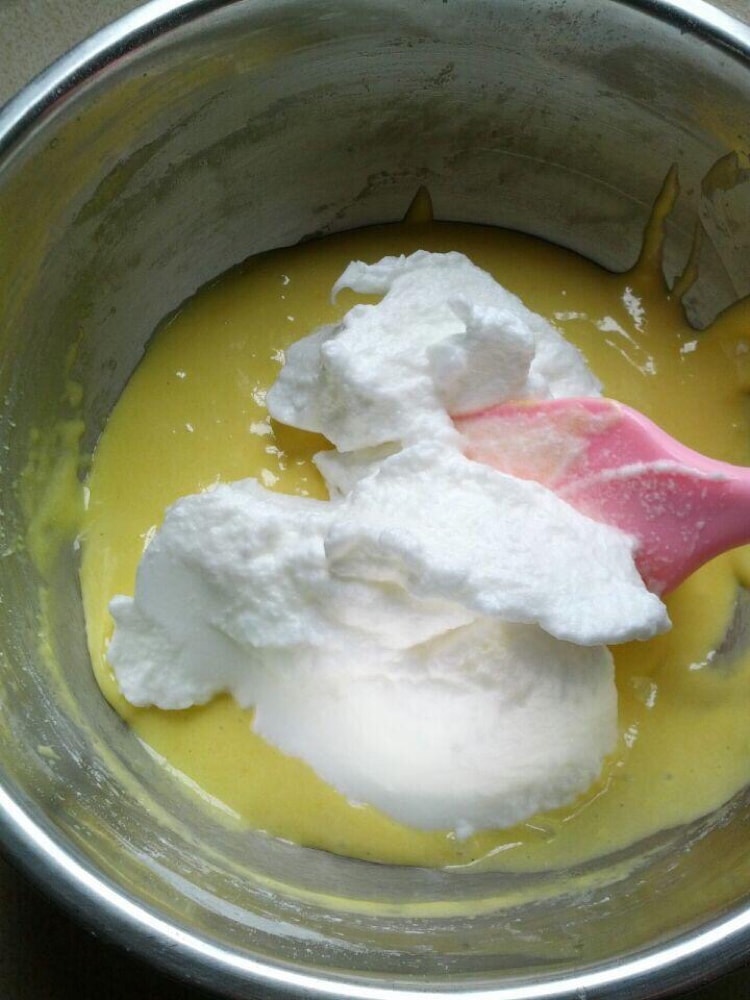
Now add a third of the meringue to the egg yolk batter span>
Mix well with a stirring technique
[Stir method:Take a spatula and cook like a vegetable Copy the yolk paste from the bottom Then turn the plate at the same time can't draw a circle < span class="s5">Otherwise the protein will be defoamed]
Pour the mixed paste into the meringue and stir again Stir well by hand, evenly refers to smooth and invisible meringue Do not over-mix, otherwise it will defoaming
This is the time to start preheating the oven
160 C or 320 F Temperature
Get out the ingredients you want to add to the mini cakes
Examples shredded coconut, chocolate, raisins etc
The choice of materials is very free Add what you want
The original taste is delicious without adding anything
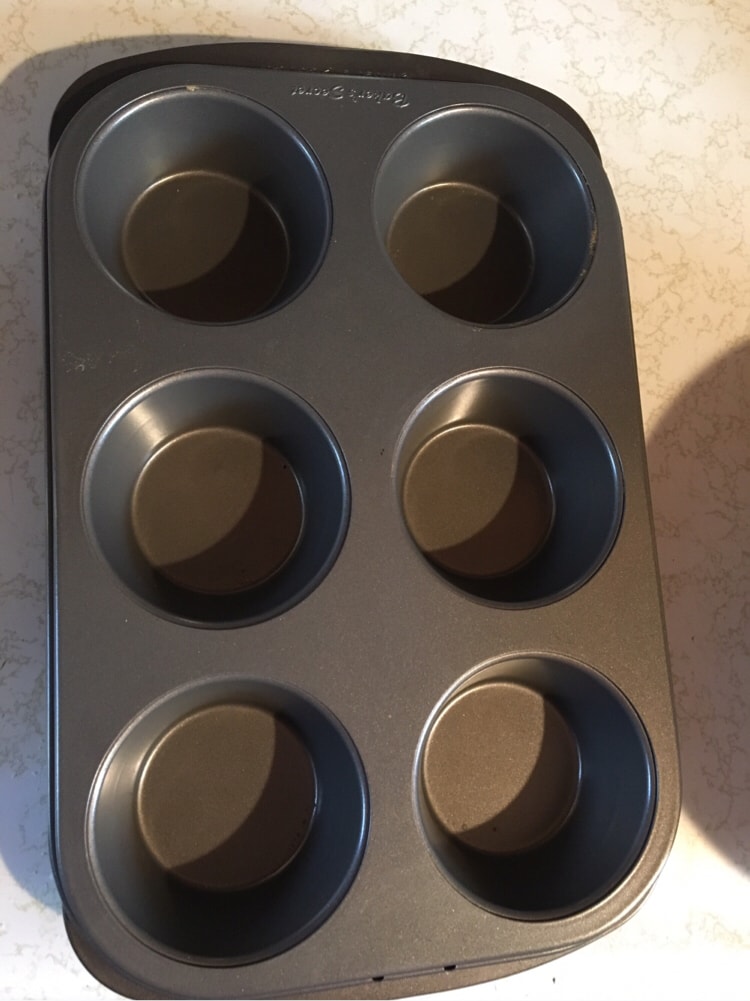
Take outmuffinmodel and place a small paper cup on it
Pour the batter first if you want a different flavor2/3Infeed cup, then add material on top, and finally cover with 1/3batter
If you want the original flavor, just add the batter directly to the paper cup
🔔The batter can't be filled to the fullest, it's enough, because it will expand in the oven< /p>
1⃣️Shake a few times on the table to remove air bubbles from the batter
2⃣️Place the small cakes in the preheated oven, 30 span>minutes
3⃣️Then you can enjoy the fragrant chiffon cakes~
If there is something you don’t understand or don’t understand, feel free to leave a message in the comment area I will share my experience and lessons with everyone!
 Show Original

人见人爱包教包会之戚风小蛋糕

自从学会了在网上学会了这款戚风小蛋糕并稍微改良之后,不仅家里人,周围一圈朋友都特别喜欢吃。而且做法简单 材料也非常常见 如果你喜欢做烘培的话 那不用说了 材料家里一定都有的
那么现在我就来教大家如何做这款戚风小蛋糕
【以下材料适用于六个小蛋糕,如果你想要做十二个,直接double就行】
玉米油:18g
低筋面粉:32g
牛奶:18g
蛋清:2
蛋黄:2
白砂糖:24g(蛋白) 10g(蛋黄)
1⃣️ 第一步,分蛋
把蛋清分到一个干净无水无油的盆子里,然后开始用打蛋机打发蛋白
【建议用 低-中-高-低 的速度来打发蛋白,这样会减少过大的气泡】
如果只做六个小蛋糕的话 可以用手持打蛋机器,会比较方便一点 但是如果像我一样一次性做几十个,有条件的话 建议还是用厨师机,不然手会很累。
2⃣️ 当蛋清用低速打发至大气泡的时候,加入1/3的白砂糖 换中速打发

当蛋清打发至小气泡的时候,加入剩下1/2白砂糖 ,换高速打发

当蛋清打发至出现花纹的时候,加入剩下所有白砂糖,换低速打发

打至蛋白湿性发泡 提起来的时候有1cm左右的弯弯小勾 就好啦

打发蛋白这一步非常重要,因为它决定了你蛋糕的口感 所以一定要耐心的打蛋白
【我前几天刚做的蛋糕,没有拍过程图 现在所有过程都是网图 就是为了给大家一个概念,下次我自己做的时候会拍照,替换掉网图】
下面我们来处理蛋黄
1⃣️把白砂糖一次性加入到蛋黄里,用打蛋机搅拌均匀
2⃣️加入玉米油 和 牛奶 用打蛋机搅拌均匀
3⃣️分三次 把低筋面粉筛入蛋黄糊,每一次过筛都要搅拌均匀
【过筛是为了更好的口感 所以这一步很重要】
现在把三分之一蛋白霜 加入到蛋黄糊里面
用翻拌手法拌匀
【翻拌手法:拿一个刮刀,像炒菜一样 把蛋黄糊从底部抄上来 然后同时转动盘子 不能画圆圈 否则蛋白会消泡】

把拌均匀的糊 倒入蛋白霜里,再次用翻拌手法翻拌均匀,均匀指顺滑并且看不见蛋白霜 无需过度搅拌,否则会消泡
这时候可以开始预热烤箱
160 C or 320 F 温度
拿出你想要加在小蛋糕里的材料
例如 椰子丝,巧克力,葡萄干 etc
材料选择非常自由 想加什么加什么
就算什么都不加的话原味也非常好吃

拿出muffin模型,垫上小纸杯
如果你想加不同味道的话,就先把面糊倒2/3进纸杯,然后在上面加材料,最后盖上1/3的面糊
如果你想吃原味,就直接加面糊到纸杯里就好
🔔面糊不能加全满,七八分满就可以了,因为它在烤箱中会膨胀
1⃣️在桌子上振几下,振掉面糊里的气泡
2⃣️把小蛋糕放入预热好的烤箱,30分钟
3⃣️然后就可以享受香喷喷的戚风小蛋糕啦~
如果有什么不懂或者不清楚的地方,尽管在评论区留言 我会把自己经验和教训都分享给大家哒!


Tomorrow、
June 16, 2018
cool
酷